When you send out an email campaign, it is possible to add customized fields.
These fields allow you to personalize your emails based on who you are sending them to.
For example:
You have sent an email campaign to three people: Jessica Smith, Adam Johnson, and Simon Brown.
With customized fields, it is possible to personalize the email so that:
- Jessica Smith receives an email with the introduction "Hello Jessica"
- Simon Brown receives an email with the introduction "Hello Simon"
- etc.
How to Create a Customized Field
To create a customized field, follow these steps:
- Begin by creating an email campaign. Please note this feature only works with the use of a template
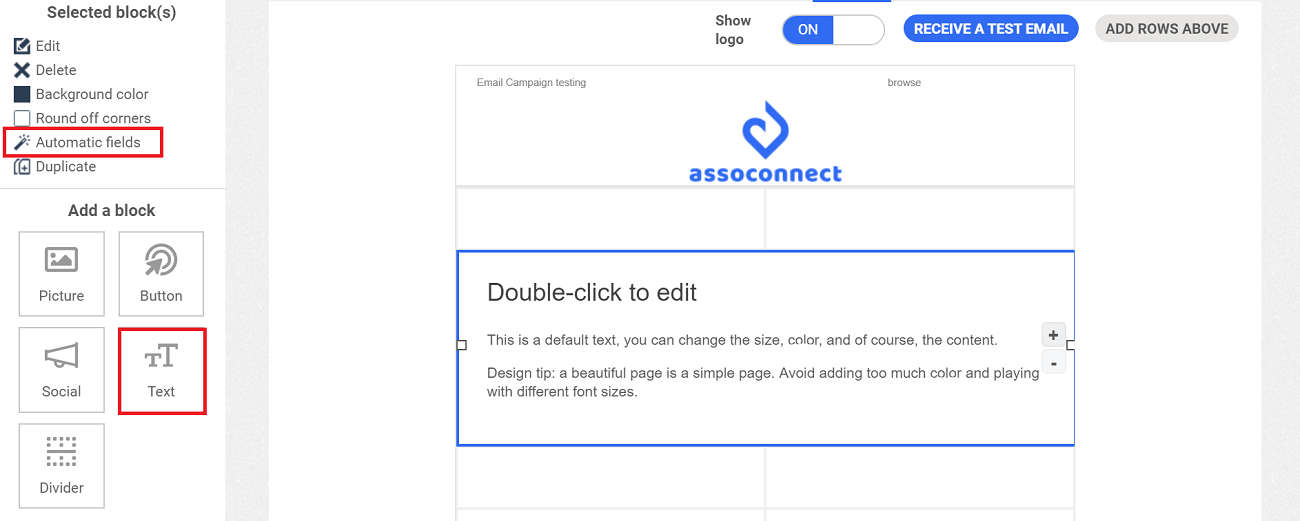
- Once you get to the Content page, select a text box from the vertical menu to the left, and drop where desired on the template
- Once the text box is placed, you will see a list of tools appear on the left menu. Select the Automatic Fields tool
- Once you have clicked on the Automatic Fields tool, a pop-up window will open, that looks like this:
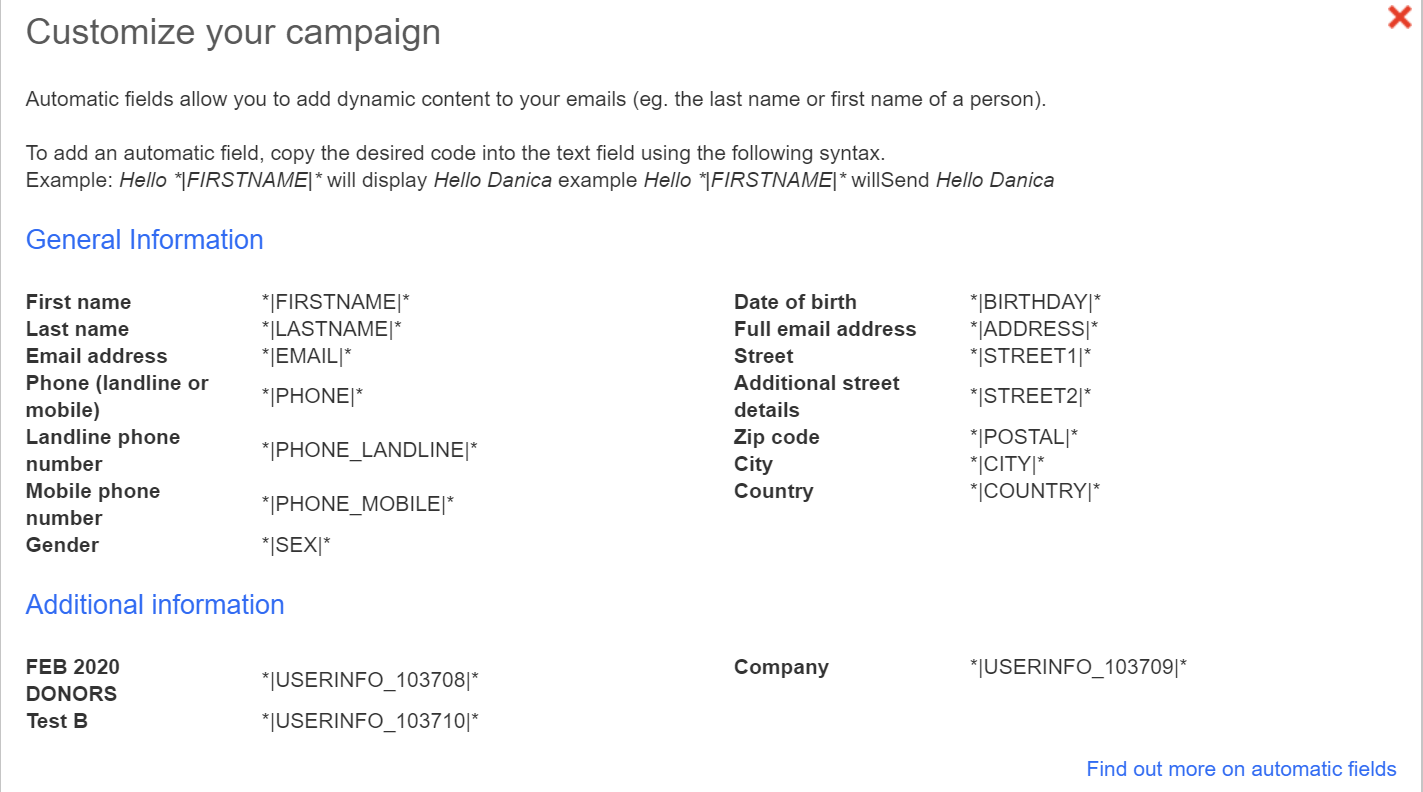
It explains how the customized fields work. - You wish to send a message to all recipients, personalizing it with the first name and address.
Example: You wish to send a message to Adam
Hello Adam,
We have recorded that you are at: 123 Main Street, Chicago.
Is this still correct?
Thank you. - To do this, you will write in your text box like this:
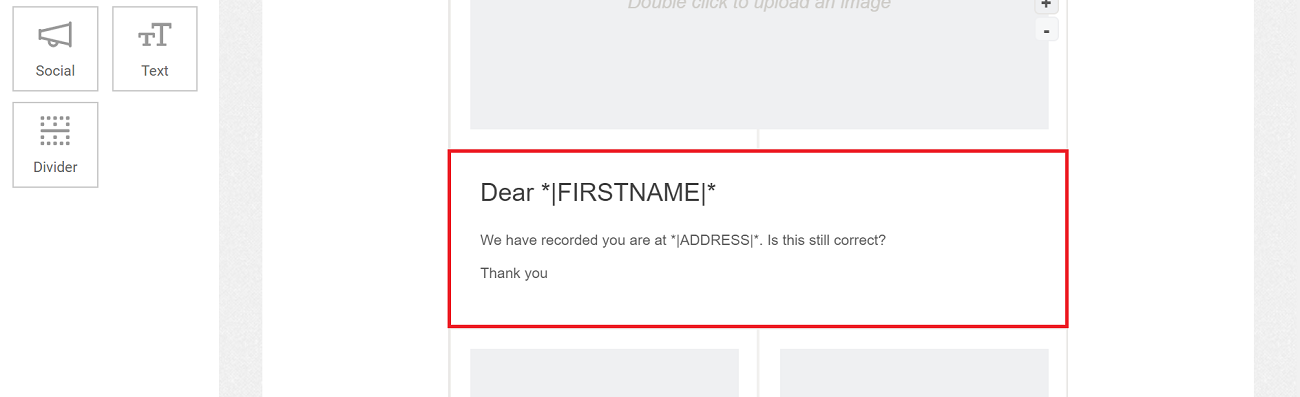
Please note that if a person to whom you are sending this message does not have a postal address recorded in your platform, the message will be sent to them by replacing the postal address with a blank space:
Hello Adam,
We have recorded that you are at:
Is this still correct?
Comments
0 comments
Please sign in to leave a comment.